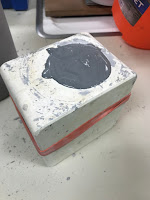
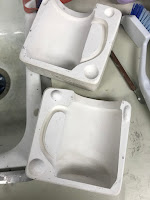
 The first thing you want to do is to clean out your mold. The first thing you want to do is to clean out your mold. |
 Wrap securely with large rubber bands. This small mold doesn't need too much support, so I've had good luck with just one.
 If your mold is large then you REALLY need to secure it. You'll thank me later for doing this! You will be pouring a LOT of slip in the mold and the weight of the clay will push the mold apart.
 Check your mold for additional fills. This hole is on the side, so it will need to be poured at a later time. Keep all pieces wet until you can join them together.
 Fill your mold to the top with slip. It's ok if it goes over a bit. Now the hard part - let it sit for awhile! Don't forget to monitor your pour.
The plaster will start to absorb the liquid from the clay and you will see the clay go down. You will want to watch the thickness of the sides. If the sides aren't as thick as you'd like them then refill with slip. You can see by this picture that the sides are a decent thickness.

Turn your mold carefully over your container to drain the excess slip. This is how you get your mold hollowed out.
Set aside to continue draining and drying. You will want to remove your mold slightly before it becomes leatherhard. If you leave it in the mold too long it may crack when it shrinks during the drying process. In my room if we pour at the beginning of the day we can remove the clay from the molds by the end of the day. My counter is directly below the heating vents.
One last piece of advice - it's a good idea to let the molds dry overnight between fills. The plaster loses it's ability to absorb the liquid from the clay when it starts out damp.


